How do I capture this breathtaking view?
You travelled a long way, slept under a starry sky, got up way too early, drove in the dark into the heart of the desert, scrambled your way up a giant sand dune and in the early morning glow the Namib Desert starts to reveal itself and everywhere you look there is symmetry and beauty as the glow of light sparkles on the dunes while the sun is peeping over the horizon, you snap away trying to absorb it all but when you get home the photos look nothing like the beauty you experienced!
Now while photos or videos can't capture the atmosphere that you experienced you still want to have some photos that do some justice to the beauty of the Namib Desert so here are some hints tips and tricks to make sure you have some great photos to encourage others to make the journey of a lifetime to Namibia.
1/ Pick your time the Namibian sun can get very strong and high in the sky quickly so ealry mornings and late afternoons offer the best times for photographs because the rest of the day the sun is directly overhead casting very few shadows leading to flat looking photos.
2/ Put your back to the sun or at least a 45 degree angle to the sun rather than shooting into the sun, all cameras struggle when pointing into sunlight giving photos a washed out look, so put the sun at your back and look left and right to find a good view.
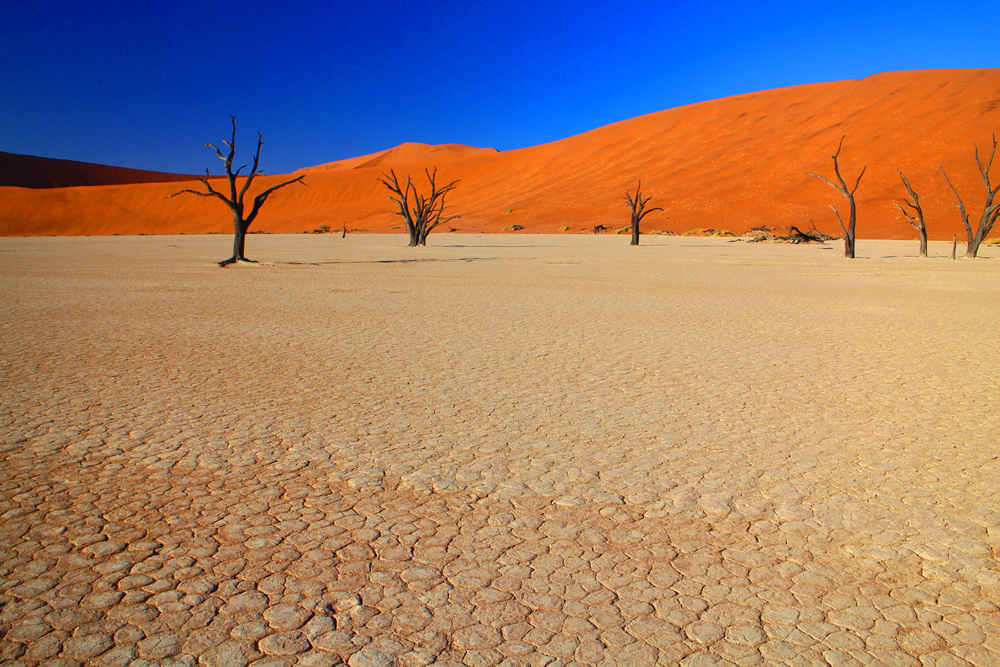
3/ Fill the frame, for most of the year the sky is a clear blue
over Sossusvlei and this although beautiful to look at can make it difficult
for cameras to work out the correct exposure with so much bright light
bouncing around.
A simple way to help the camera and produce better composition is by tiliting
the camera down a little so the sky is only the top quarter or less of
the photo this exposes the sand better and have a big empty sky as abig
part of the photo.
4/ Look for lines, one of the beauties of the Namib Desert are the graceful curving lines and the steep sides of the sand dunes, try to frame your photo so one of these lines starts near the bottom corner of your photo, this is called a leading line and draws people into the photo. combined with filling the frame this can make for some very beautiful photographs.
5/ Set up with a wide angle lens (do this the night before your trip you dont want to change lenses in the desert), as mostly you are capturing vast landscapes so a wide angle lens shooting at a large aperture (f8 to f22) will give the best results.
General tips
Charge batteries (and take a spare battery) and pack all your equipment the night before, a good waterproof camerabag is helpful as the fine desert sand will get into everything, most modern cellphones are now at least water resistant so that keeps them safe but getting sand into a dslr or mirrorless camera is not good for them for two reasons:
First digital sesnsors are very sesnsetive to dust particles and especially wide angle lenses and any sand creeping into the camera will stick to the sensor and show up as a blob on all your photos!
Secondly the sand in the namib desert is has iron particles in it and they are conductive of eletricity so sand particles making thier way into the camera if they get to any electrical parts of your camera can cause a short that stops your camera working altogether!
So wrap up your camera well in a sealed bag, you can even use a zip lock freezer bag to put it in for additional protection because even in the lightest wind the sand goes everywhere.
If you have a camera where you can change the lens (dslr or mirrorless) put the lens on at the camp the day before as you do not want to be changing lenses in the desert.
Make sure you have plenty storgae space to take lots of photos, its a very beautiful place you will want to take lots of photos.
Enjoy your trip, we hope you get some great shots, we would love to see them reach out to us on social media (links at bottom of page) to share your photos of Namibia.